Showing posts with label Customised Stencil. Show all posts

A LITTLE BIT OF AUTHENTIQUE PAPER CELEBRATION AT MAD ABOUT SCRAPPIN

I was so lucky to be given the 'Celebration' range of pp's by Authentique Paper as my DT kit for this month at Mad About Scrappin, and after creating several pages from this fanatstic paper range it seems the kit was a sell out, very exciting stuff. I have an uncompleted page which I will show you once I finish it but here is what I created using the range so far and will update the post when its done ;).
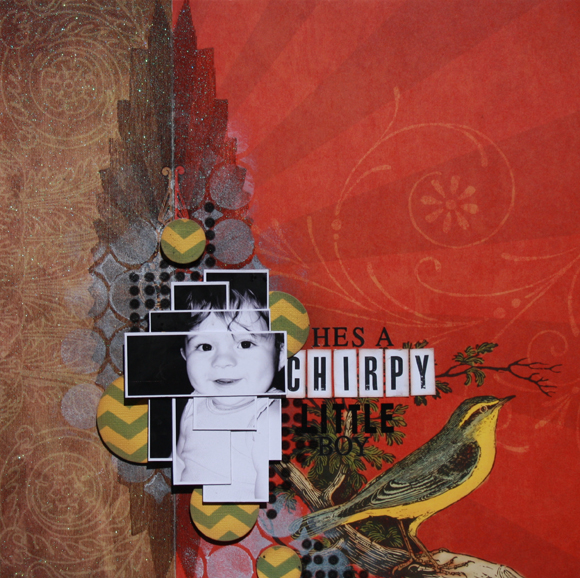
In this layout titled 'U&I' I thought the 'Enjoyment' pp leant itself to a bit of fussy cutting which I havent done in ages. I also made a mask from Tim Holtz make 'Your own mask' film using the floral design as inspiration. From the Elements Stickers sheet I used some of the pieced words to form the journaling and to echo a stylised version of brick work which was a fun way to combine the journaling and also add an element of interest.
 
This lo titled 'Don't Stop Playing' I decided to go with the 'B side' of 'Rejoice' pp, that was a given since I am a huge fan of woodprint patterns tee hee. Anyhoo I used a Page Draft template which will be released tomorrow :) I did some really basic gessoing to tone down the base paper then collaged some blue tissue paper to add a soft layer of colour then using a stencil I inked some black spots to help ground the teeny tiny photo's. Finally I added some female icons, the word art and journaling using some Grafix Rub-Onz transfer film which you can buy at Scrapboutique.
The base of this page was done by collaging some word strips I printed then gessoed over the top to tone them back. I then layered some torn strips of the 'Happy' pp on the left and cut some circular discs to add some interest. I also used some funky little 'Road' washi tape from the lovely Amanda of D-Lish Scraps.
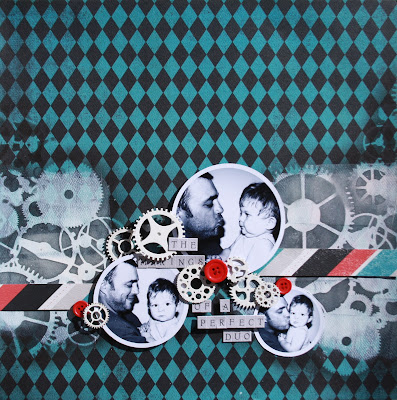
This one is called 'The Makings of a Perfect Duo'. I loved these piccies of my hubby and son so decided that I would make a boy page using the eye catching 'Laughter' pp as the base. I gessoed some white areas then distress inked in black using the 'Mini Gears' Crafters Workshop template. I had to ink it a couple of times heat setting it between each application. Then I used some fabulous chipboard cogs and gears purchased from ScrapFriends.


Lastly these two cards were created using some of the 'Details' Stickers sheet.

So there you have it, my latest lot of DT pages for MAD, hope you like them. xo
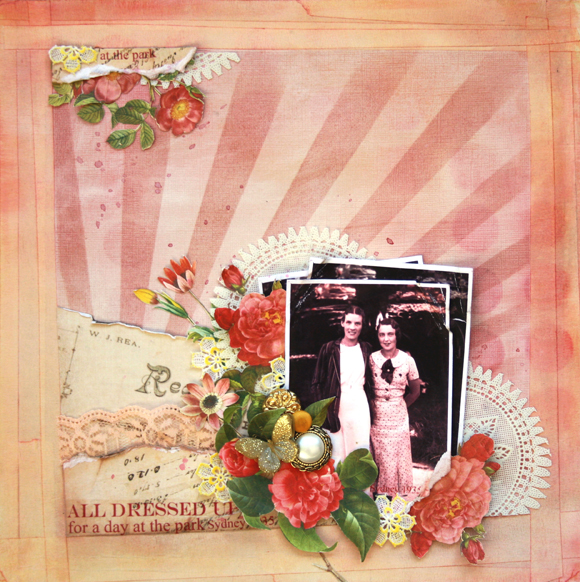
APRIL SKETCH FOR MAD ABOUT SCRAPPIN!

Hi everyone,

The Sketch for this months challenge over at Mad About Scrappin was revealed yesterday. My other site Page Drafts has been commissioned to do the next 6 months worth of sketches and there are some fun ones coming up but this months wont disappoint.

So if your keen for a bit of a challenge all you have to do is create a traditional or digital layout using the sketch below as your inspiration.
Then pop over to Mad About Scrappin' facebook page here and load it into the gallery before midnight Wednesday 25th April to be in the running for a whopping $25 worth of Manor House Creations Flowers.
Here is my dt page and as you can see I quite literally interpreted the sketch as is which is a first for me, I usually try to put my own spin on it, but I guess I can be let off this time since I created the sketch tee hee.

In this one I used some Basic Grey &  Hambly Prints transparent circle paper teamed up with some cardstock.  I also included some customised glass cabachons to add dimension to the circular disc embelishments and printed my journaling on Grafix Rub-Onz to finish it off.
Tip: You don't always have to follow a sketch to the tee, instead of using papers try using a stencil like I have here with the tiger stripe that I created by cutting the pattern out of acetate, it adds more depth and  a varied point of interest.

Happy scrapping everyone, hope you have a crafty week ahead of you and thank you for stopping by xox

A LITTLE BIT OF BERRY71BLEU FOR YOU

I am so excited to be sharing with you my Guest DT spot at Berry71Bleu: Handmade Tags, Pages and more. The wonderful Mari (Marivic) sent me a box of scrapping goodies all the way from Texas which included some awesome little tags that we had to incorporate in a page or project.


I included a Berry71Bleu Tag in a baby Shower gift the altered art challenge that she set. It was a perfect match for a little boy bubba. 
Tip: Save baby formula tins they make perfect containers and are easy to cover in patterned papers.

This LO was for little Bethany who was celebrating her 4th birthday. The Berry71bleu tag had cute little cake embellishments on it so was a perfect fit for these photos and a great way to add hidden journaling.
Tip: Repetition of shapes on your page really create an eye catching and resolved design. If circles are your main shape then include some journaling strips to add some extra points of interest.

This layout was an extra page using some of the other bits and bobs Mari sent me.
Tip: Try different ways of using your photo's, this layered mosaic format is an easy way to add some fun to any page.

Mari also asked for a quick Tutorial so I decided to do one on making stencils. This is one of my all time fave things to do and really adds a unique touch to your pages.

HOW TO MAKE A CUSTOMISED STENCIL

Have you ever used a stencil or template in your project, if so do you love the effects you can create using them? In this tutorial we will look at how to create your very own unique re-usable stencil so that you can customise and add some extra points of interest to your projects. Here is a page I create dusing the stencil below.

Materials needed:
12X12 plastic stencil sheeting
Craft Knife
Ruler
Marker Pen
Photocopied Image of design

Step 1:
Mark your 12"x 12" border on the plastic sheeting; this acts as a guide for your overall size of template.

Step 2:

You could draw your design directly onto the sheeting or create a design in a photo-editing programme like Photoshop or PSE. If you choose this option, print out your image and use that as your design guide just as I have here.

Step 3:

When you are happy with your design align it underneath your plastic sheeting making sure the image remains confined within the outlined 12X12 border. Tape it along with the sheeting to your cutting mat to prevent it from moving then begin the careful cutting process. 
Hope you find this tutorial a fun way to add that little extra something to your layouts and projects.
Happy stencilling!
Em Stafrace
©2011

WATER WONDERLAND...

Tige experienced his first swim in the big pool in our complex a couple of weeks ago. Aunty Leonie was visiting and we decided the weather was perfect for a quick dip in the pool. Although he loves the bath Tige was a little less impressed at first but within a minute he was splishing and splashing like a seasoned water baby.


The current word prompt at BITW is 'Wonder'...the perfect word to use in the title of this recent milestone in Tige's now aquatic life tee hee.
Isn't he the cutest little water bubba you ever laid eyes on, lol... thought I'd share with you that I also created a customised misting/inking sun ray screen for this one cutting it out of plastic stencil sheeting which you can grab from your local art store or Spotlight.
Thanks for stopping by, hope you have a fabbo day xox

7 DOTS STUDIO 'DREAMER' PAPERS

OMGoodness, when Leanne from Mad About Scrappin approached me to Guest DT I was excited but when she showed me the gorgeous papers from 7 Dots Studio latest PP release I was doing cartwheels. These papers are absolutely divine. The A sides are an explosion of colour, layers and textures and the B sides are soft, warm and simply divine. So I had an absolute blast with these papers here's a product image of the range. 


So if you like what you see here and are interested in  buying a kit to create similar projects to the ones below scoot on over to Leannes FB Page and snaffle up a kit before they sell out or buy yourself some of the papers! :)
Here is an image of the 7 Dots Studio release,
and below are my layouts using the 'Dreamer' range.
I used black tea to stain the paper and create some lush grungy drips. I also used a paper doiley as a mask to ink  the background. Tip: To add some extra bling why not glue some beads to your page they are as cheap as chips and are an unexpected little addition to any page.
Below is a close up of the beads I used Dimensional magic to adhere them.
Cut your photos into circles is a great way to add some interest to your page rather than the same old same old standard formats. 
 Tip: Layer lots of different masks, tapes, stamps and stitching to create and interesting focal point.
Cut out some random shapes from card stock and lay them directly onto your paper before inking. This is a perfect way to add some points of interest to an already very busy patterned paper.
 Tip: Try using some transparent embellishments to add a little extra something without being too obvious.
Gesso, Gesso, Gesso, this should be a staple in your scrap stash. Its an awesome way to tone down an intricate paper without detracting from it. Its also a perfect preparation for inking and misting on top of.
 Tip: Layer lots of elements and cluster them tightly, this is a rule of thumb when I create a page. Also consider using lots of different textured materials and fibres, particularly things you can find around the house...Save onion and garlic bags they are priceless! 
And finally, combine all those tips into one page, tee hee. Masking, Inking and gessoing are fantastic techniques and tools to include in all your pages.
 Tip: Dont feel like you always have to have lots on your page, less is more in some instances, often just one embellishment and or one wordart speaks volumes.
Hope you likey! xox

ME & YOU...

Its that time of the week again, time to reveal the new palette #80 and my DT project for TCR check out the details here.


Here's both the traditional and digi versions of the layout and the palette below which I reckon is a loud & bright one, so had lots of fun playing with it. 


I am loving the 'Authentique' PP range so used it as my base for this project, added some of my own Digital elements and used another mini diagonal customised mask that I created which you can just see peeking out from under the photo in orange paint.
The strange thing that happened is BITW have a challenge set using 'YOU&ME' as the word/phrase inspiration which you can see here, but the really strange bit is that I had already created this lo for TCR weeks ago well before the You and Me challenge was set at 'Bird is the Word', dont you think that is freaky???? or maybe just some kind of symmetry going on between two of my fave scrappin' hang outs lol! Anyways just had to share that tee hee.

Have a wonderful weekend guys hope you get some serious scrappin' going on!

TOGETHER... we have it all!

So so very excited to share with you my first DT design for Bird is the Word and this fortnights word reveal is 'TOGETHER'. Go check out all the particulars here. Its such a popular challenge site with often over 70 subs which amazes me, so I am itching to see what eye candy will be subbed this release!


Here is my page called 'Together...we have it all'.
I used an old October Afternoon PP, Basic Grey PP, Imaginarium Designs chippies, my all time fave Grafix Rub-Onz and of course lots of handmade fimo and glass cabachon embellies and finally a touch of lace (I don't usually go for lace, I hear some of you gasping, tee hee), but these purdy little lace flowers are simply gorgeous. Anyways you can get your hands on these goodies at Handmade Halo.


Thanks for stopping by and I hope you like my first DT page for BITW :)

SCRAPPING LIKE THERE'S NO TOMORROW!

I have been busy trying to pass my time with Dan gone for an extra week this hitch, so inbetween Tige's sleeps I have grabbed the proverbial bull by the horns and scrapped DT work like there is no tomorrow!

This week I did a couple of layouts for Handmade Halo using the gorgeouse Pretty Little Studio papers which you can pre-order through Halo. They are a fabbo vintage/retro inspired range of papers with heaps of cute little accessories and Corinne also makes some awesome embellishments that compliment the papers so go check PLS out, then drop Corinne a line and she will tee you up.

Anyways here are the couple of LO's I have done using the Vintage Shop and the April Showers Paper ranges and some of the fantastic new stencils from The Crafters Workshop, I have got a serious crush on these new designs and have yet to play with some of them!


Its also 2 days past TCR reveal and again I am late in sharing my DT page. So better rectify that and pop it in this post.


I know its another LO using the same photo agggggaaain, but I love this image of my mum and my aunty they were both such cute little girls and its also because I am trying to get more in touch with the vintagey girl within me and this photo inspires that. Not so sure I managed to capture what it is I am going for but I just love this photo.

I also used this page for Halo because the handmade flower is one I created from sheets of Microfiche film similar to the one below,
Corinne added to my DT pack to see what I could come up with. So I decided I'd make a Transparent flower, by inking the film with alcohol inks then melting the edges with the heatgun. Very cute flower me thinks...
Okay going to scoot now time for Tig-lets breaky could do with some toast and a cuppa myself. Hope you have a beautiful relaxing Sunday and a fun week ahead.
Thanks for stopping by xox

ITS SWELL!

Phew I finally did a catch up on my hybrid versions of past TCR layouts. Here's 'Sweet Serenity'from palette #75 and 'Be True'below that from palette #71.
To create the diagonal stripes on this layout I hand cut a screen from stencil sheeting, its a very affordable way to customise your designs and lots of quick and easy fun. All you do is draw up your design using a sharpie, mark the areas you want to cut out with a 'C'for CUT this helps keep you on track and then carefully cut out your design using a scalpel or stanley knife. 
Oh and almost forgot to share some piccies from the weekend. We went on a little family outing down to Currumbin to introduce Tige to the wonders of sculpture and art. The Swell Sculpture Festival is an annual event up here and is well worth a look if you ever in town during this time. Here were some of our faves and a couple of piccies of Tige to throw in the mix!
Little Tig-let holding the bottle on his own!
Tig-let trying to suck his thumb and drink at the same time.
a little hot and bothered...
 having some fun with daddy!
and a cool entry/vestibule into a block of units tucked away in one of the streets we were walking around. I had to stop and take a piccie I felt like I was transported elsewhere to some far away exotic land!

Now back to dreaming of travel, oh to just jump on a plane! ;)