Showing posts with label Hybrid Scrapbooking. Show all posts

POCKET LETTER SWAP | FRIENDSHIP

This month I decided to join in on the Pocket Letter Swap over at The Lilypad and can I say I am hooked! Some of you may know that I love to make ATC’s but its been such a long time since I’ve participated in a swap and its been hard finding one in my local area to meet and make some new friends that also love ATC’s.

Anyways, I noticed a few digi girls on FB asking each other if they had started their pocket letters and I was like wahhhhh??? What is this? So I scooted over to the Hybrid forum at TLP and what I saw was like a massive beacon of goodness beckoning me to join in! The Pocket Letter swap group was just my cup of tea. These girls are seriously creative ladies and they were making some flippen' awesome Fullsleeve ATC sets! 

How it works is you team up with a partner and begin to make your own full sleeve to swap with them. You include a letter and if your wanna share some wee gifts in your parcel you can too. This is ATC’S ON STEROIDS & YOU GET A PENPAL too! Love it!

FRIENDSHIP
HYBRID VERSION

DIGITAL VERSION

I have to say I am definitely hooked, these are so much fun to make and who doesn’t like receiving a full sleeve of ATC’s? No-one ever!
Hugs Em x

LOOK I'VE BEEN PLAYING WITH SCISSORS!

Well, that was fun! Its been oooh I don't know maybe 5 months since I have made a traditional scrapbook page! I know wow hey...but I definitely describe myself as a digi kinda gal these days...however thats not to say I don't enjoy getting up close and personal with my scrappy stash every now and then! I can now guarantee there will be a few hybrid pages over the coming months because something exciting has happened!!!

Some of you may know that Sissy Sparrows are digital scrapbook designers. I hang with these creative ladies everyday playing with their digital scrapbook kits...being on their team is something I feel so lucky to have the opportunity to do as they are incredible ladies and my all time fave designers.

Anyways when I caught up with Jules and Don in November last year they were telling me all about their new venture in making rubber stamps! So I have been waiting with baited breath for the release and its so very very exciting to finally be able to share with you all that Sissy Sparrows has a great new collection of rubber stamps available for purchase at their etsy store to check them out click the banner below...


So of course I had to make a page using them, here is the hybrid version.
 'A Popular Look'
Materials Used for Hybrid Version:
Damaged Diary Rubber Stamps by Sissy Sparrows
Printed Elements from Damaged Diary Art Journal Kit by Sissy Sparrows
White Cardstock
Dylusions Lemon Zest Ink Spray
Gelatos
Graphix Rub-Onz
Acetate, Tissue Paper, staples and Cotton Thread

A little close up shot!

The gorgeous rubber stamp set I used...omg love love love it!
These stamps really are fabulous to play with. They are perfect for scrapping but would be equally as versatile to use in art journal or mixed media style projects so are well worth checking them out!
Below is the digital version kinda like my prototype for the hybrid version...
'A Popular Look'
Digital Credits:
Damaged Diary Art Journal Kit by Sissy Sparrows
In The News Digital Stamps and Brush Set Newsletter Freebie by Sissy Sparrows
Nice Threads by Sissy Sparrows
Mixed Tapes Vol.1 by Sissy Sparrows
Tissue Textures No.2 by Anna Aspnes

✰UPDATE✰
This digital page got a GSO at Scrapstacks woohoo!

Here is a really quick video showing you how I put together a Hybrid page from a Digital project.


Oooh and Sissy Sparrows also released a beautiful kit and two co-ordinating packs this week called 
The Gardener's Journal another one well worrth checking out.

Here is my DT page using the kit and is of my mumzie and I around 1972-73.
'Wipe Your Tears'
Digital Credits:
The Gardener's Journal Kit by Sissy Sparrows

Thanks for stopping by, hope you liked the pages I shared today and have a great weekend everyone!
xo


MY EXCITING NEWS!

It seems this time of the year is when everyone is sharing their exciting news! A big congrats to all the lovely ladies who were appointed the 2014 Masters such an awesome bunch, especially a big congrats to Monica Brady, Chantal Vandenberg, Chantalle McDaniel and Natalie Elphinstone you girls are amazing and comes as no surprise to me that you were all selected, you'll be knocking everyones socks off chickies! 

Oh and of course a big congrats to all the other fabulous creatives out there and for your newly appointed DT and CT spots right across the scrapbooking arena, I can tell 2014 is going to be a great year for everyone! he he

I too have something exciting to share and have been biting at the bit for months now wanting to spill the beans and finally I got the green light from Ellen the lovely editor of Scrapbook Creations magazine and can now share it with you all!

I am ecstatic to say I have been offered the position of...


...how awesome is that!!! I'm that excited I look like a Cheshire Cat grinning from ear to ear and have been for months now. One of the biggest positives from this whole thing is I now have a really good complextion...there is nothing better than a perpetual smile to help iron out all those pesky little wrinkles let me tell ya! lol

So stay tuned for issue #103 my first offical article will be featured in that one and will continue to see lil' ole me as a permanent fixture sharing some of my tried, true and tested personal tips, tricks and handy hints for creating cool digi projects! I am also planning on sharing some 'How Did They Do That? type of videos on the SC blog too  oooh...and please dont be shy over the coming year to let me know and or share either here or on the Scrapbook Creations Blog all your fabulous creations inspired by the articles it would be totally amazing not forgetting to mention a huge buzz to see your finished pages and projects.

I will also be staying on for a second term as one of the... 
of which I'm also really excited about. There will be lots of beautiful palettes and designer tips in that content of the mag so check it out too you wont be disappointed!

Finally to finish off this years blog posts I thought I'd share some of my all time fave projects from 2013. So here is my Top 12 from this past year, a mix of digi and hybrid pages. 

'100% Boy'
Digital Version

'100% Boy'
Hybrid Version

'It has to get Better'

'Little Sprout'
Digital Version

 'Little Sprout'
Hybrid Version

'Addicted to This'

'Shine'

 'My Ikeem'

'Wise Monkey'

'A Magic Moment'

'Beep Beep'

'The Elf'

Have a fabulous new year everyone and please stay safe. I can't wait for 2014 its going to be a ripper of a year and really look forward to sharing another year with my scrappy friends!
Blowing you a big Kiss,
Em X

AN INVINCIBLE LITTLE SPROUT

So the last 12 months have gone incredibly fast which means my term as Guest Designer for 2 Crafty Chipboards has now come to an end. Its been a lot of fun getting the glue and scissors out and especially playing with chipboards in my traditional pages. I am not one to use them normally but I have to say I completely understand why people do and am now a 100% convert, a page is not finished until you've used a chippie ;)

Just wanted to say a big thank you to Vanessa and the 2 Crafty team for welcoming me into the creatove hub, and of course to all the 2 Crafty followers for all your lovely comments and inspiration. You are all very sweet!

Okay well here are my last two pages both of which were orginally designed as digi pages but because I loved these designs so much I decided I would see if I could make hybrid pages showcasing some of the 2 Crafty chipboards for good measure!

  I did this one of my godson, Kellan. Its a little page dedicated to how he is growing taller and taller every time I see him... it blows me away. I decided after going through my stash of chipboard the Summer Leaf Stems would be a perfect fit for this theme as well as emulate the leafy stems in the digi version.
 
'Little Sprout'
Hybrid Version

I also used the Chicken Wire Panel two ways to help create some depth and texture in the background.
Tip: Try loading the chipboard with some paint or Versa Magic Ink and whilst its still wet flip it over and stamp directly onto your base paper just like you would a stamp, its a fun way to multi task your stash and creates a cool effect too. 

…here is a close up so you can see what I mean.


'Little Sprout'
Digital Version
Mish Mash Stamp Stash Value Bundle 02 by Captivated Visions
Creme Caramel Value Bundle by Captivated Visions

Below is my second and very last page for 2 Crafty. This one also features Master Kellan when he was 3 and was originally a digital page too just as 'Little Sprout' was.
'Invincible'
Hybrid Version
Fencing wire
Circles
Assorted Arrows
Family Symbols
Polaroid Frames
Stars
Forever Loopy Font

'Invincible'
Digital Version
The Red Journal Vol 1 by Sissy Sparrows
Wasted Breath Mini Art Journal Kit by Sissy Sparrows
Wasted Breath Overlay Pack by Sissy Sparrows
Wasted Breath Trim Pack by Sissy Sparrows

If you'd like to see more of my Hybrid V's Digital projects you can check them out here at my
 Hybrid Gallery Set over at Flickr.

Have a great week and thank you for stopping by.
Em xo

A LITTLE EXPOSÉ...

I am not sure if you guys know, but I am on the Scrapbook Creations Colour Expert Team this year.
I am very honoured to be included but the year is winding up very quickly where did it go?
I was very excited when I was approached to join the team because I L.O.V.E colour... its one of my passions. The way colour can evoke emotion and really support a theme or idea gets my heart beating, guess thats exactly what its meant to do he he. I am constantly searching for different combinations that would not normally seem a good match at first but can work well
together when you tweak the hue or tone.

Anyways the editor of the mag decided she thought I was interesting enough to interview for the
'Who's Who' segment in the last publication Issue #100. This blew my socks off...wow feeling very humbled to be featured and in the celebration issue taboot...PARTAY!

So given we are now onto issue #101 I thought I would share my projects here with you that I created especially for the article about moi and hey if you are still keen to read about little ole me scoot down to your local agent you may be able to pick up the old copy at a discount lol!!! ;)
'Head in the Clouds'
IQ Border Madness by Studio 68
Paint Touches {Sol} by Studio 68
Vintage Heart Doiley by Scrappin' Cop
______________
'Cloud' Vellum by Em Stafrace
Peaches & Cream Paper by Em Stafrace
All other elements created by Em Stafrace

'You Boys'
'Smile for Me' and 'Life is Good' Kits by JM Designs
Tissue Textures No:1 by Anna Aspnes
Pinstripe Textures by Anna Aspnes
Miss Mint Book Plates by Peppermint Creative
Dictionary Defined Boys by Peppermint Creative
Stitched Sequins v.01 by Peppermint Creative
Biggie Bet- Milk Alpha by Peppermint Creative

Here is the hybrid version of 'You Boys'

This one got a GSO in December!
'Summers Selfie's'
My Happy Place Paper Pack Collab by Studio 68 & Stolen Moments
Paper Piercing Stitching Holes- Basic by Sahlin Studio
Instaframes by Sahlin Studio
Tagged and Flagged Journal Strips by Allison Penningtom
Tabloid Frenzy Digital Brushes by Mels Brushes
Cogs and Brads by Em Stafrace

This one was created for the colour feature in Scrapbook Creations Issue # 98.
'Walking in Daddy's Shoes'
All elements and papers created by me.

'DUCKface'
Nevermind {the collection} by Studio 68
This one got a Gallery Standout in September which was exciting!

So there you have it some pages I created a while ago but havent shared here until now, hope you like them.

Have a great week everyone and thank you for stopping by,
Hugs Em xo

A PROMISE TO MYSELF!

I know we all go through it...that time in our lives when we question the choices weve made and we wonder why we didnt follow through on those dreams we envisaged or the goals we had. Turning 39 a few years ago was the birthday that really shook me up ...it took me for a six! I had this huge wake up call and realisation that half my life had already been lived...F'me! Sorry for the swear word but its a milder version of the melt down that really transpired lol. 

My imminent 40th was only 12 months away and it felt as though the last 40 years had passed me by without achieving anything that really stood out as something I could be proud of. I had a reasonable career in Visual marketing and although I enjoyed aspects of it I didnt feel challenged by it. I had no children, (not for the want of trying) and a difficult family situation compounded those feelings of inadequacy. Life, in my books was not a lot of fun!

I felt like I had squandered those precious years in a career that simply paid the bills and that was my lot, work, home, work and home, surely there is more to life? Okay maybe it wasn't all that bad, but I really did feel like I was one of those unfortunates that would never find her true calling or have a family of her own.

But then I had an epiphany and quite literally it woke me in the middle of the night and it went like this...

If I am lucky I will live until the ripe old age of 80 (84 has always been my number)...
then I have 40 odd years left to enjoy it so just get on with it girl!

I cried and cried...because I realised the one thing that was holding me back was my own fears. My fear of failure, that ever present self deprecation that I was not good enough stopped me from giving it a go.

The process wasn't as easy to achieve it was actually quite arduous and in some ways still is. I had to change a lifetime of thinking a certain way. I had to change how I viewed myself and its not been easy. Its taken a lot of heart ache, trip ups, weeding out people from my life that I realised weren't what I thought they were, nurturing and re-establishing old friendships that I had let go wayside because I was lost. Trusting again...trust ooh that is a biggie and setting boundaries is a biggie but I think I am getting it now! lol

Anyways that was 3 years ago but recently I created a digital page to document this poignant moment in my life. I liked the digi so much I made a hybrid version of it to which you can see directly below the digital version. Ooh and these pages were also created for a little expose on moi over at Papero Amo a fabulous shop and community of Czechoslovakian scrappers.
 '39'
Credits:


Thankfully things are definitely back on track...with all its ups and downs life is a busy one. I have my own design business yep I took the plunge, I have a supportive husband that has too, gone through a challenging time in his life but its because if this that he is my greatest inspiration....and well most importantly we have a beautiful little boy that is my/our forever expanding universe!

I CAN HONESTLY SAY LIFE IS GOOD!

yay...she says with a sigh of relief ;)

Hugs Em xo

FINDING MY TRUE NORTH!

I can't believe its been 4 weeks since my last post, just goes to show I have been head down bum up getting work done he he..But I have missed my blog and missed you guys so I hope you still remember me ;)
I have a few shares for you so here goes.
This page is my latest CT page for Sissy Sparrows using the fabulously amazing new
Room 19 kit called 'Voyage'. 
It is filled to the bring of everything you could possibly need to created a funfilled whimsical and magical style page including papers, elements, handdrawn accents, paint strokes and word art.
'Finding My True North'
Credits:
Room 19 Project #8- Voyage by Sissy Sparrows
Tuesday Template: Week 4 by Megan Turnidge
Here are a few more pages created for the Sissy girls I have been slack with my blogging sorry Jules and Don ;)
'Lost in the World of Imagination'
Credits:

'Sweet Sleepy Dreams'
Credits:
Page Play Overlays
Sand Textures Elements Pack
Things of Beauty Grunge Stamps
Adrift in Dreams Mini Art Journal Kit
I also managed to play in the latest Painted Nest Challenge over at Scrapbook Graphics. 
Come and join in we'd love to see you there! Here is my page using the freebie and it got a little GSO (Gallery Stand out) bit chuffed I have to say!
'I Love These'
Credits:
Freebie TPN kit
Black Crow Mini Art Journal Kit
Can of Crazy Paper Pack
Grunge Stamps Vol.2
Unafraid Bubble Wrap Textures
Unafraid Full Kit 


Are you still with me I promise I am almost finished he he... just a few more pages and then I'm done jeepers I need a coffee after this post lol...

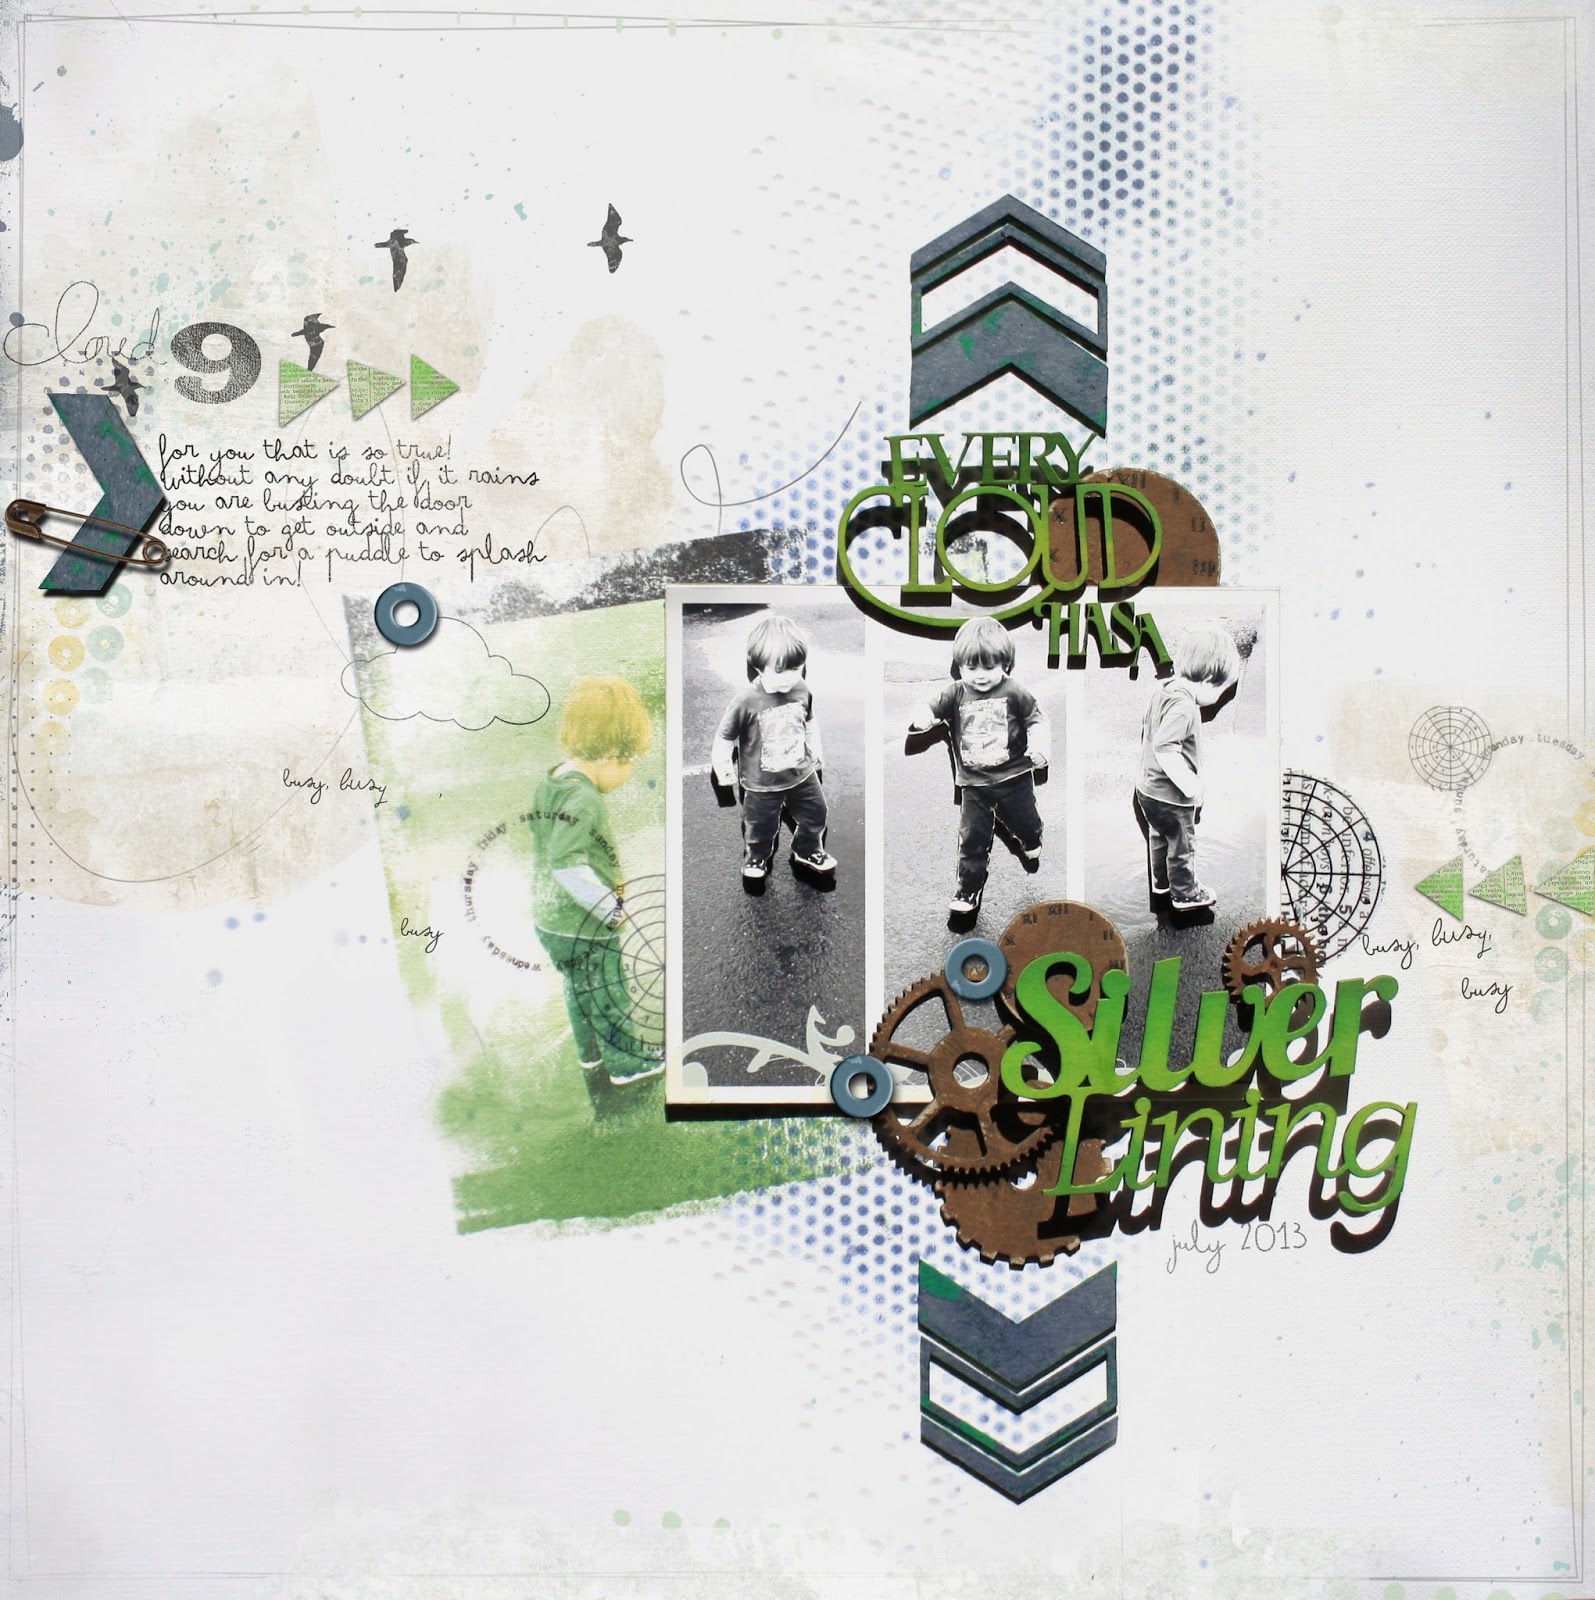
Anyways here is my last two recent CSI DT Pages the first was also the combined Double agent project for 2Crafty Chipboards so I have a hybrid page to share ...wowzers I know thats a rarity these day for me lol. The one below was for Casefile #84 including the Page Drafts sketch  ;)
'Every Cloud Has a Silver Lining'
Materials:
Chipboards from 2 Crafty Chipboards
I also used some digi elements printed on Grafix Rub-Onz from Studio 68.


This is digi is also for CSI using Casefile #86 as inspiration.

 '2 Cute for Words'
Credits: Studio 68
Love Struck Border Madness
Additional elements created by me.

...and last but not least this pretty page of my girlfriends daughter Ella looking...
well...I have to say just a bit spesh was created for Studio 68's current release!
'Duckface'
Credits:
This page also got a GSO wow on a roll at teh mo ;)
Thanks everyone hope you didnt fall asleep he he.
Have a great weekend filled with lots and lots of fun stuffs! xo
Photobucket

SPLISH, SPLASH

This little hybrid project can finally be shared it was done for Scrapbook Creations Issue #98. Its an article about photo manipulation and a quick look at creating a hybrid project using digital scrapbook products. I love this project it was one of the first pages I did that sparked a change in my scrappy style, so is a bit of a flag ship page he he and excitedly it got a GSO today so am doing a happy dance. 
Then I thought why not share some of my techniques I use in my scrapbook process,
so here is a quick tutorial looking at a couple I use often.

'On Cloud 9'
Digital Credits:
Everyday Alpha Pack
Retro Vector brushes by Obsidian Dawn
Other:
Woodgrain Embossed Overlay by Emma Stafrace
Pea Miss Priss by Kevin & Amanda Pea Fonts
Impact Label
Impact Label Reversed


 PART 1

Creating a Digital Photo Mask
To make this project you will need some Intermediate Photoshop knowledge.


Step 1:
Open a new blank file setting the resolution to 300 for optimum printing / RGB Colour Mode/transparent file (NB: For the purposes of this article I have made my background white). From the brush palette select a fun shaped brush like a halftone dot. This design works well because the central area is a solid colour. Then select the colour you want to use and stamp the brush onto your blank file. This forms the basis of our digital mask.


Step 2:
Open your photo file. If your using a colour photo convert it to B&W then click enhance /adjust colour/colour variations. This will open a dialogue box, which has a series of different values that we can tweak to alter the photo’s colour so it resembles the same colour of the brush we stamped in step 1.

Step 3:
Drop your coloured photo onto the mask and position so it is centred. Highlight the photo in the layers palette, whilst pressing the shift key hover your curser between the two layers and press click. This will engage both layers and form a clipping mask. You will notice in the layers palette that the top layer has shifted to the right and an arrow appears pointing to the layer below. To remove the defined rectangular edge of the photo select from the erasure tool palette a soft edge basic brush. Then carefully delete areas of the photo so as to soften the defined edges until your happy with how it looks.

Step 4:
Combine the layers by highlighting them in the layers palette and select merge layers from the drop down menu. Now you have a cool halftone dot photo ready to include in
your digital and hybrid project.

.....................................................................................................

PART 2:
Creating a customised rub-on.

When I designed my digital page incorporating the halftone photo we created in Part 1 I set my dimensions at 3600 x 3600 pixels with a resolution of 300 pixels per inch. This way when we print our file it will transcribe into the same size format of a traditional page. I also cropped my original b&w photo using a triangular cookie cutter in PS for some extra visual impact. There are plenty of shapes to choose from so try some out and see which one works best for you.

Now that I am happy with my digital design I am going to keep the editable PSD file open so I can begin the cut & paste steps to create the printable word document.

‘On Cloud 9’
Materials used.
Woodgrain Embossed card stock- Spotlight
Grafix Rub-Onz
Hero Arts Cling stamp- Stripes Pattern
White Acrylic Paint
Versa Color Ink- 11 Canary
Tattered Angels Glimmer Mist- Cinder
Memories Mists- Mango Lemondade
Dimensional Magic
Black Dymo Tape
Washi Tape
Toothpick
Masking/Scotch tape
Chizler/Paper Creaser
Scissors
Microsoft Word Program
Printer

 Step 1:
Isolate all the elements you want to print as a rub on, including the halftone dot photo mask we made in Part 1. Merge those layers together and then select cut. Open a new file and paste them into it.

 Step 2:
The new file needs to be flipped so it becomes a mirror image. This is a very important step
before printing. Once completed save as a .jpeg file onto your desktop.

 Step 3:
Open a blank word document setting the margins as wide as possible, then insert the .jpeg file. It should remain the same dimensions as was formatted in your digital page assuming that you create your digital pages in the standard size format of 3600X3600 pixels at a resolution of 300dpi.  Insert the printable sheet of Grafix Rub-Onz film into your printer and set your printer options at Transparency media type. This will prevent any excess ink and bleeds during the printing process


Step 4:
After the ink has dried on the transfer film we can adhere the clear sticky film over the printed side of the transfer film. Instructions are included in your Grafix Rub-Onz pack. Using a chizler or paper creaser carefully smear any bubbles out making sure to not puncture or tear the surface.

Step 5:
Cut around your design as close to the edge as possible.
Then peel the shiny adhesive backing off from the underside of the custom rub-on.

Step 6:
Carefully lay that onto your base paper and rub gently until the opaque film turns a whiter shade. Now peel that layer off revealing the rub-on below.

So there you have it, a really fun way to showcase all of your favourite photos. Creating the mask allowed us to use the original photo in a different way. Then by cropping the b&w photo into a different shape and overlaying it on the masked version created a visual impact that far surpasses any standard photo format. I hope this inspires you to look at your snapshots differently and hopefully try this technique out yourself!

Photobucket