
I am so excited to be sharing with you my Guest DT spot at Berry71Bleu: Handmade Tags, Pages and more. The wonderful Mari (Marivic) sent me a box of scrapping goodies all the way from Texas which included some awesome little tags that we had to incorporate in a page or project.
I included a Berry71Bleu Tag in a baby Shower gift the altered art challenge that she set. It was a perfect match for a little boy bubba.


I included a Berry71Bleu Tag in a baby Shower gift the altered art challenge that she set. It was a perfect match for a little boy bubba.

Tip: Save baby formula tins they make perfect containers and are easy to cover in patterned papers.
This LO was for little Bethany who was celebrating her 4th birthday. The Berry71bleu tag had cute little cake embellishments on it so was a perfect fit for these photos and a great way to add hidden journaling.

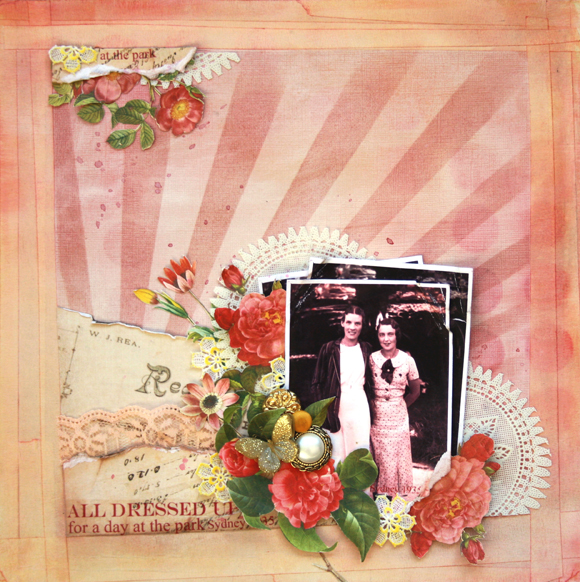
Tip: Repetition of shapes on your page really create an eye catching and resolved design. If circles are your main shape then include some journaling strips to add some extra points of interest.
This layout was an extra page using some of the other bits and bobs Mari sent me.
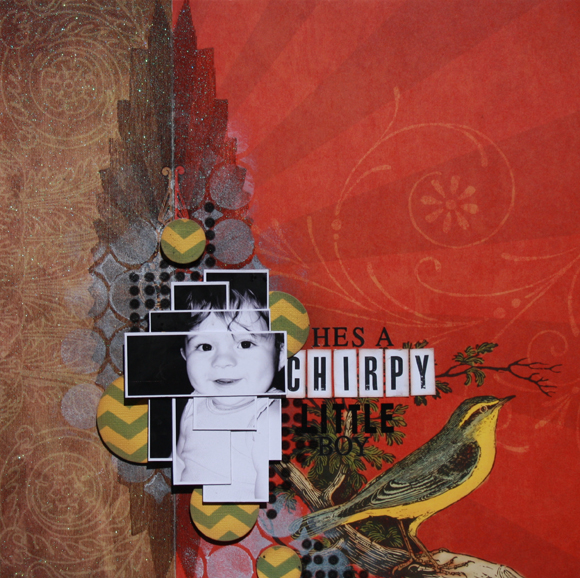
Tip: Try different ways of using your photo's, this layered mosaic format is an easy way to add some fun to any page.
Mari also asked for a quick Tutorial so I decided to do one on making stencils. This is one of my all time fave things to do and really adds a unique touch to your pages.
HOW TO MAKE A CUSTOMISED STENCIL
Have you ever used a stencil or template in your project, if so do you love the effects you can create using them? In this tutorial we will look at how to create your very own unique re-usable stencil so that you can customise and add some extra points of interest to your projects. Here is a page I create dusing the stencil below.
Materials needed:
12X12 plastic stencil sheeting
Craft Knife
Ruler
Marker Pen
Photocopied Image of design
Step 1:
Mark your 12"x 12" border on the plastic sheeting; this acts as a guide for your overall size of template.

Step 2:
You could draw your design directly onto the sheeting or create a design in a photo-editing programme like Photoshop or PSE. If you choose this option, print out your image and use that as your design guide just as I have here.

Step 3:
When you are happy with your design align it underneath your plastic sheeting making sure the image remains confined within the outlined 12X12 border. Tape it along with the sheeting to your cutting mat to prevent it from moving then begin the careful cutting process.

Hope you find this tutorial a fun way to add that little extra something to your layouts and projects.
Happy stencilling!
Em Stafrace
©2011
Absolutely gorgeous layout!!!!
ReplyDeletelove the tutorial...thanks for the inspiration
hugz
irini
I have a very excited little girl here seeing herself on the computer lol!!! Beautiful layouts Em and Beth is excited to have a layout designed by Em!!
ReplyDeleteHi Emma,
ReplyDeleteI love everything you've done!! These are all stunning! Thank you, thank you!! I will post your tutorial tomorrow. You are such a fun and sweet person to work with..very prompt too..It's truly appreciated!!
Hugs..Marivic